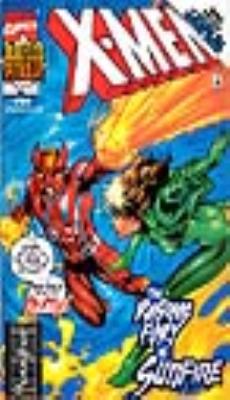
X-Men #94
- Publisher
- Marvel
- Year
- 1999
- Month
- 11
- LastChanged
- 2/3/2024 7:53:51 AM

Hidden Lives
- Writer - Alan Davis
- Penciler - Alan Davis
- Script - Terry Kavanagh
- Inker - Mark Farmer
- Colorist - Marie Javins
- Lettering - Richard Starkings
- Lettering - Comicraft
- Lettering - Saida Temofonte
- Editor - Mark Powers
- Editor in Chief - Bob Harras
Pandora's Box
Summary
Sunfire fights Rogue, thinking she's Mystique. She bangs on him till he notices she's super-strong and can fly.
While Mystique naps on the couch, Kitty finds Destiny's facemask and realizes how little she knows about Rogue's upbringing. She flips through framed pictures, and on the back of one finds written: "CAT SHADOW X REACH IN D." She reaches in and finds Destiny's journal.
Sunfire explains: the Japanese government has been on the trail of a metamorph assassin, and evidence points to Mystique, but Rogue doesn't think she'd murder or leave evidence. She shows him that Ronnie Lake was in Switzerland when the murders were committed, so it must have been a frame-up.
Lorna tells Kurt she feels Havok is alive, since if he were dead, his counterpart the Living Monolith would have returned. Kurt knows the Monolith was last seen hurled into space, but he doesn't want to dash her hopes.
Sunfire realizes Mystique's telescope is pointing at an observation post in a warehouse across the East River. Mastermind evacuates.
Kitty reads the rambling journal, with glimpses of the future (lots of A's and 12's, and "Death kills the one who is become Death"), and an apocalyptic struggle in the year 2000.
Rogue and Sunfire bust into the warehouse, Sunfire blasts a guard monster, and they find Mesmero and Mastermind, the latter of whom died of the Legacy Virus (UXM Ann. 17). Sunfire realizes they're shape-shifters; their soldiers attack, Mastermind flees, but Mesmero shoots him down and blows up the base to keep their secrets.
Lorna apologizes to Kurt for sounding paranoid, and he says goodbye. She locks herself into her apartment, then makes a magnetic seal. She looks at the crystal on Havok's old uniform, which still shows some activity. She is observed by a Skrull in the shadows.
Mystique thanks Rogue for straightening things out and says goodbye. Kitty shows Rogue the journal. Story 2:
Test to Destruction (10 pages) Feature Characters:
Prof. X, Cyclops, Marvel Girl, Beast, Angel, Iceman Regular Characters:
Havok, Lorna Dane Guest Stars:
Villains:
Magneto, Blob, Toad, Juggernaut (all as illusions) Other Characters:
Credits:
Writer & Art: John Byrne, Tom Palmer
Letters: Richard Starkings & Comicraft's Saida Temofonte
Colors: Greg Wright
Editor: Jason Liebig
Editor-in-Chief: Bob Harras
Dedicated to the Memory of: John Broome Note: this is a preview of X-Men: the Hidden Years, written by John Byrne, and takes place after UXM 66.
The X-Men have taken a Sentinel craft (UXM 59), and Xavier makes them recheck it for booby-traps. They grumble, also angry that he made them think he was dead (UXM 42). Scott is more patient, however.
Hank notices a panel that wasn't there before. Magneto appears and attacks them, then Blob, Toad, and Juggernaut. Xavier sends Jean to help the boys, even though she's in on the ploy. She puts Blob to sleep, then Magneto wraps her up and takes down Scott, who realizes it's all an illusion. He lets Juggernaut swing at him, and it passes right through. Xavier ends his mental projections. It was just a pop quiz.
Bobby is livid, especially when Lorna and Alex show up together. Scott is disturbed that Xavier is still treating them like novices.